Between winter's wrath and kittycat antics, it's been awhile since I've posted about the worm bin. I started this bin
November 2nd, 2006 and it has been very easy and fun...going much better than my
first attempt. So way back on
May 4th, I had discovered that the initial bin was getting full, so I added the second bin to begin the migration so the worms would all move into a new bin and leave behind their valuable
castings. This image is from
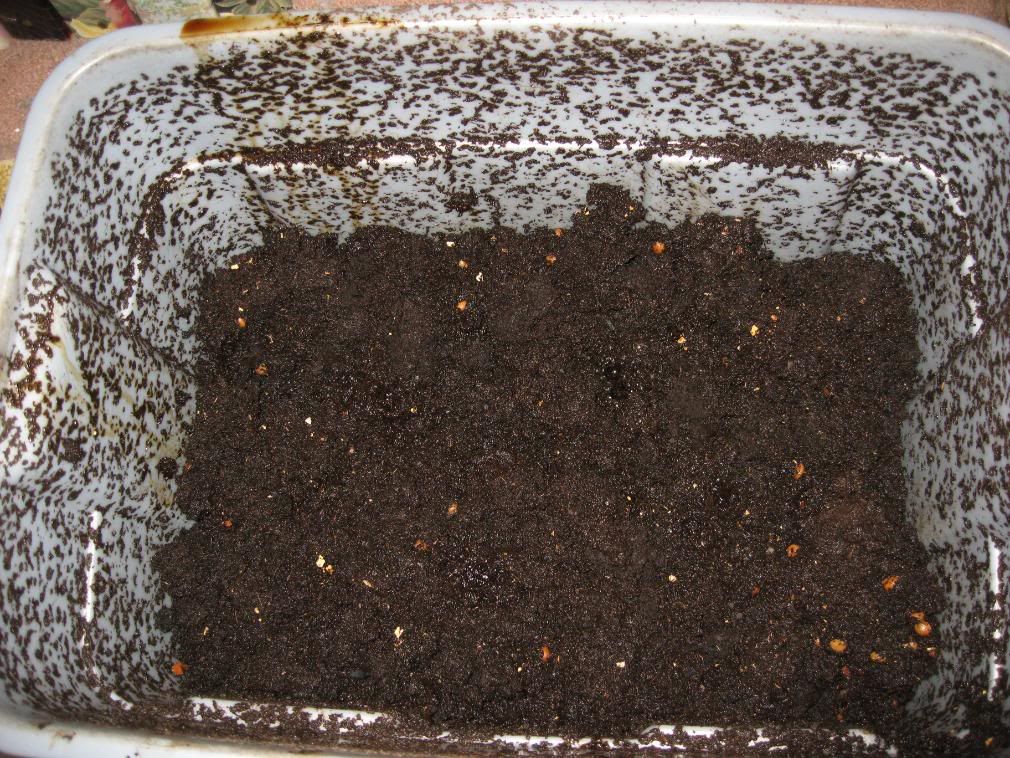
August 2nd of this year, when I thought the second bin was full enough for me to separate them...

....the bedding looks good, and the worms do too.

Remove the top bin...that's quite an indent onto the bin below! (At this moment I realized that it wasn't a good idea to let the cats lay on top of the bins! Ooops!)

Hey...there aren't supposed to be worms in here! According to my original bin
plans, the worms should have all migrated to the top bin and the bottom should just be castings. Unfortunately I didn't actually
read my plans again at that point, or I'd have realized that I was supposed to let the second bin get nearly full
before separating them. So I forged ahead...

...and upon checking the under-bottom bin discovered a lot of liquid as well as sludge (of
course, since the chubby cats were pretty much squishing the bin like a sponge!). So I poured it out to use on my plants. I've seen it said in various worm forums that this liquid is merely
leachate, and not valuable to plants, but my personal experience says otherwise.

There! Clean and ready to catch more liquid...

....but I'm a bit concerned that I'm leaving too many worms behind in the bottom bin with the castings. So I put a couple handfuls into the "new" bin, added a food layer, and closed it all back up. (The bin is now kept in a room where the cats can't lay on it.)

Take the castings, worms and all, outdoors to use in various places to condition the soil. (This was last August.) That whole bottom bin of castings (14 gal. Rubbermaid tote) and the leachate sludge was used up much more quickly than I thought it would be...I'm gonna try to feed them more frequently in the next year to accelerate the process, about twice a month or so. (You
can just toss in scraps daily or as you have them on hand also, but I like to layer them with bedding in one big feeding.)

As I looked over my notes to summarize the worm bin experience: from 11/2/06 to 10/22/08 I have opened this bin 22 times, 15 feedings, with an average feeding/disturbance rate of @ once a month. The longest undisturbed, "oops-I-forgot-about-these-guys": 5 months! So, can a single person maintain a worm bin with minimal effort/available scraps: yes! Can you have a worm bin if you travel regularly and have to ignore it for long periods: absolutely! Is this one of the easiest, most satisfying ways to compost and have some "finished product" available, even in the dead of winter:
definately!


 ....the bedding looks good, and the worms do too.
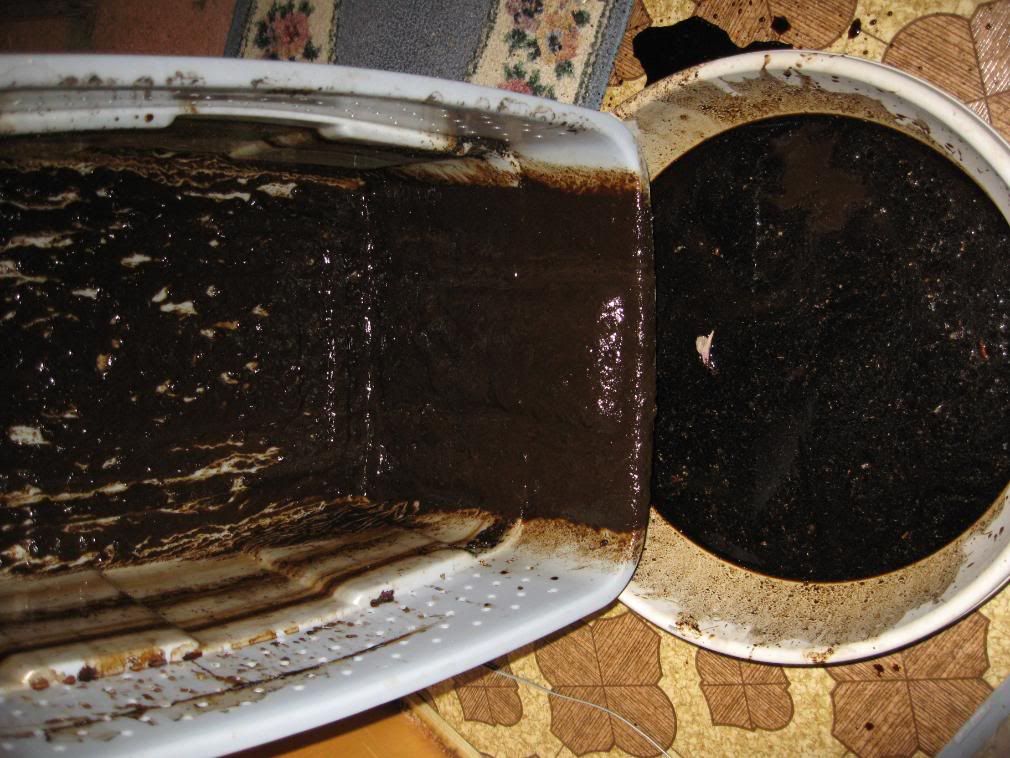 There! Clean and ready to catch more liquid...
14 comments:
I have been wanting to do this for a couple of years. Maybe 2009 will be the year I get started. Looks like you have done a great job. Thanks for sharing!!
Hi, I enjoyed reading your report from that bin. Thank you. It is always so interesting to see what other gardeners are doing.
I learn so many things from your blog, it's always so much fun to see what you are working on & all thoes pretty images through the seasons.
I'm going to add you to my blog listing on my site :)
Any tips on how to keep my one cat from not scratching the new chairs I just got!!
Grr, he is so dam smart & I cant figure out a way to keep him from not trying to claw up my chairs. He never did this before - Haaalllp!!
hehe
xoxox
Joey
Cliff-You won't be sorry that you started one! They are easy and fun!
Barbee-Thank you! I'd been meaning to post this for a long while, but "real life" kept getting in the way.
Joey-Thank you! I really enjoy your blog too, you have such fantastic ideas for crafts and decorating! I especially enjoy the low-cost aspect of your designs...it irritates me when some magazine tells you how to "decorate for under $200"...ha! How about under $20?! Plus your usage of found items is just right up my alley...I'm an avid collecter of various antiques, primatives, and good ol' junk! :) As for the scratching...wow, I don't know. Aside from having kitty de-clawed, maybe there's a repellent product that won't stain but may discourage him? Or maybe you could cover the chair and sprinkle cayenne pepper on the cover so he gets it on his paws. Sounds mean, but I can't think of anything else, unless you want to buy a Scat Mat.
Lisa,
thank you very much for your comments on my blogs.
Love to read all of them and I appreciate your visits.
Hope everyone if your house has a wonderful Christmas and a Happy New Year!
Gisela
Thank you Gisela! Have a great Holiday season yourself!
I can't help but think that a worm bin would be a great way to compost up here. I do have a compost pile outside, but it's hard to get to in the winter. Maybe I'll do some research and start a worm bin in my craft room area. I see you just used rubbermaid totes, are they the 18 gallon size? My mind is spinning with possibilities!
I think worm bins are especially suited for us "snow bunnies"! :) The links in my text will lead you to the instructions, and it was pretty easy to make the bin. I used 14 gal. totes, but you could go bigger if you wanted. The plans suggested 10 gal. size, but the 14 gal. work fine for me. (I think a larger bin makes it easier to regulate the moisture.) Another benefit to a worm bin in the north is access to free ice fishing bait! (If you're into that sort of thing :)
This is a great writeup. Your compost looks great!
To deal with the leachate, I either drill holes in the bottom, or line the bottom with coco coir to suck it up. The worms love coir. It is shoveled into the garden and helps condition the soil when it is done cooking.
Thank you! I do use coir in the bedding (along with shredded paper), but putting some in the bottom liquid-catching bin is a good idea. I've had worms drown in there in the past, so the coir would make it safer for them...thanks!
Lisa,
THis is a great and useful post. I started a worm bin last summer (2008) and had to leave it outside while work was done on our basement. I brought it into the basement, but the temperatures got down to 50 and the worms suffered. I still have some, but I'm not sure how many. I'm going to look at all your links and collect some more tips. thank you.
Thank you! I noticed that my worms eat less/slower when temps get low like that, but I hadn't seen any casualties so far. (Unless they have their own "undertakers" to clear it up.) There are some very helpful worm forums out there, one is definately in my links. Good luck!
I'd like to try worm composting, but have been hesitant. It's good to read someone else's trials and tribulations with it.
You should go for it! I found that once you get the moisture level right, it's a piece of cake. Plus the forums are helpful for trouble shooting, and I'm more than happy to help as well! :)
Post a Comment